Integrations are an important and very powerful tool inside of your business center. Integrations allow you to connect your business center with, for example, your autoresponder, customer relationship manager (CRM), and more.
Once you've integrated with your other systems, you can create rules and events that trigger when someone interacts with your courses, products, and membership. For example, adding all buyers to a list in your autoresponder, or tagging users who have completed specific courses.
In this article, we'll cover how you can start adding integrations to your business center today.
IMPORTANT NOTE: We are adding more native integrations all the time. However, if for some reason you don't see your specific third-party software in our list of integrations, we have an extremely flexible and powerful Zapier app that can basically allow you to integrate your business center with any other software!
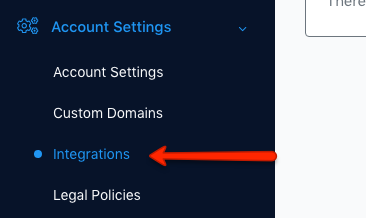
In order to add your very own integrations, log in to your business center and navigate to Account Settings -> Integrations.

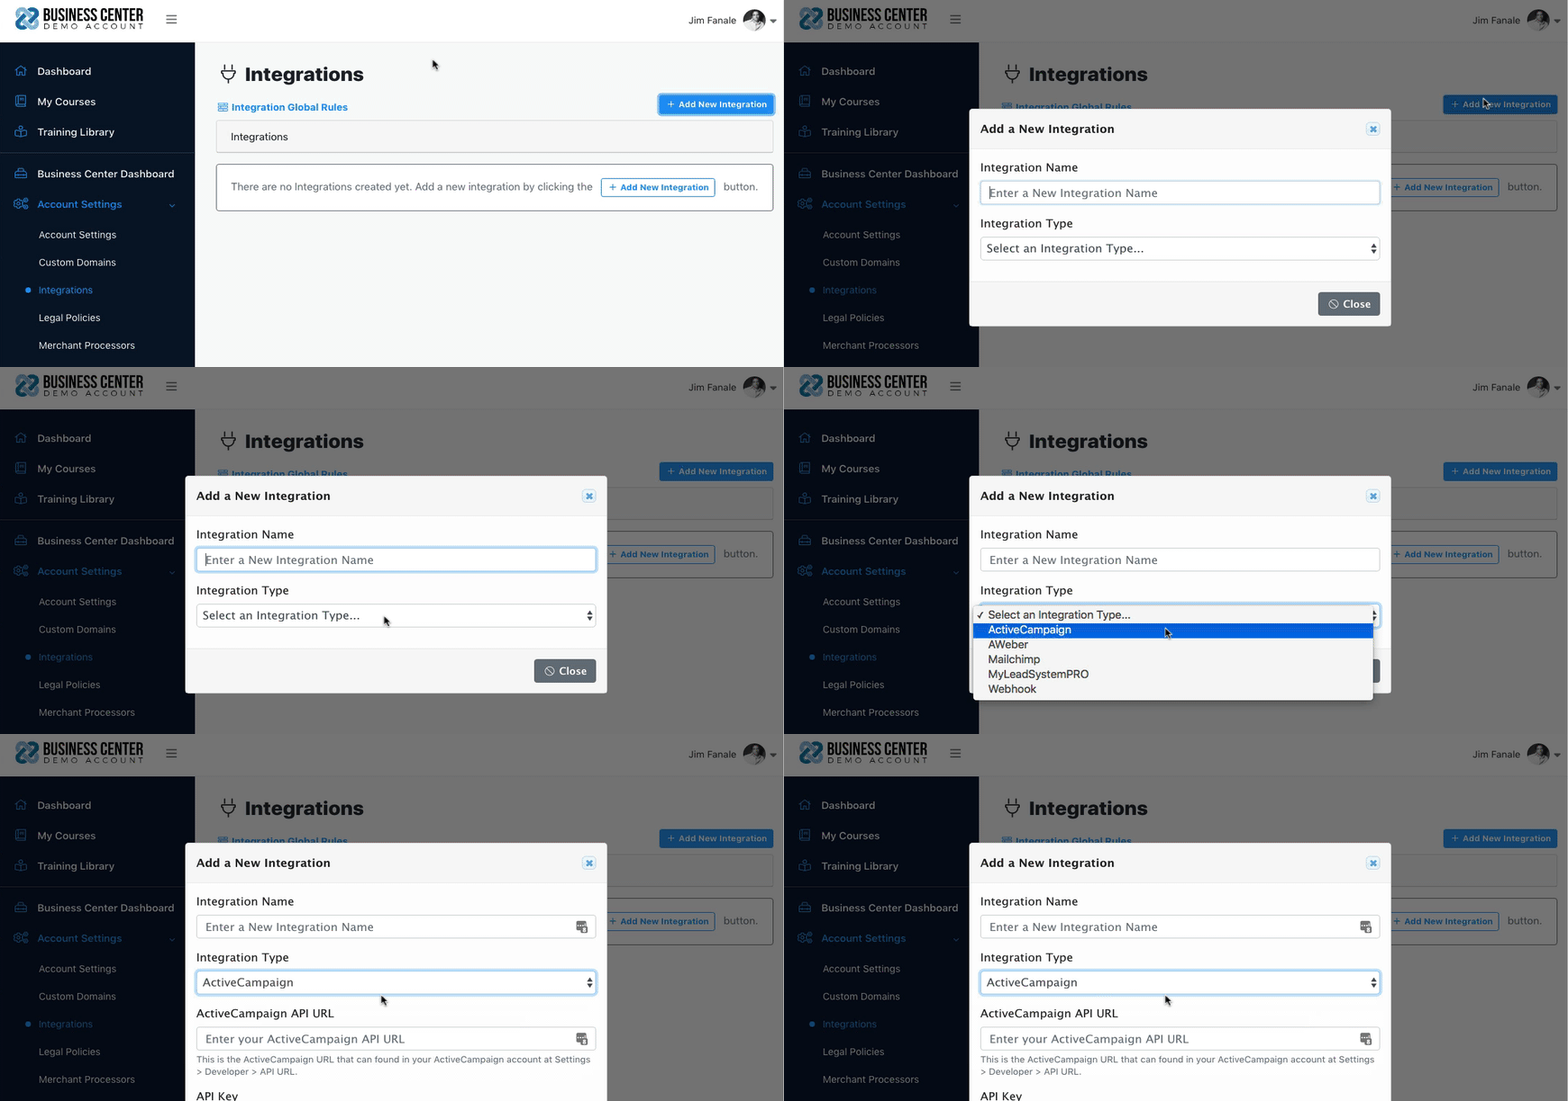
Once you access your Integrations area, you can click on the 'Add New Integration' button to connect your business center to your other web applications, like your autoresponder and CRM.

Name the integrations (this is for your organizational purposes - nobody else will see this name.) Then, select your integration from the dropdown menu and follow the instructions on how to complete the integrations.
Each integration has its own setup which typically just requires either logging in, or entering your accounts' API key.
Once you have added your integrations, you will then be able to create integration rules that trigger during specific user interactions in your business center. Rules are how you get your integrations to do things, like sending lead information to your autoresponder, or automatically registering leads for a Zoom webinar.
Learn how to create Global Integration Rules for your overall business center here.