Your page form settings allow you to add & remove form fields, connect your autoresponder, tell the system where to send the lead, and more.
In This Article
Accessing Form Settings
The form settings on a page will effect EVERY FORM used on the page, whether it is a form item, or part of a popup form. The form settings can be accessed in a few different ways:
-
Click on Page Settings in the Sidebar Control Panel, and then click on Page Form Settings
-
Click on any form on the page or in a popup form, and then click the blue 'Page Form Settings' button
Editing Form Fields
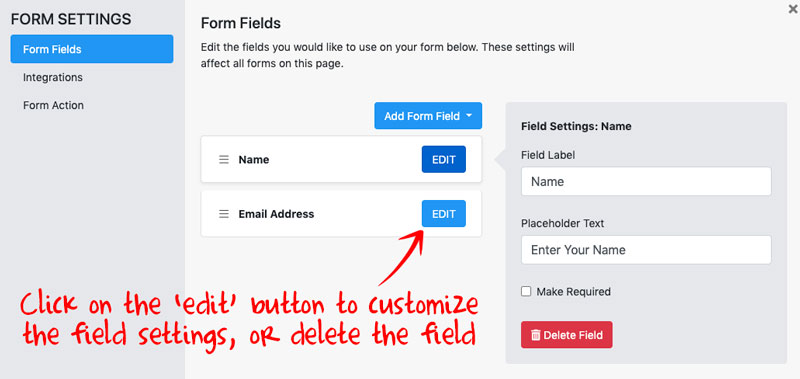
The first group of settings that can be customized in the Page Form Settings Popup is the 'form fields.' In this tab, you can add and remove the specific fields that you want to be a part of your form. Currently, you have the options for:
-
A name field
-
An email field (always required)
-
A phone number field
-
A consent checkbox
You can choose to change the field name, the placeholder text, and choose if a field is required for the form to be submitted, by clicking on the 'Edit' button next to the form field you want to customize.

Form Integrations
The integrations tab is where you will create 'Integration Rules' for your form. This simply means that you tell the system what you want to do with the users information when they optin, or submit the form. For example, add them to an email autoresponder, or register them for a zoom webinar, etc.
IMPORTANT: In order to create an integration rule, you must have already added an integration in to your business center under Account Settings -> Integrations.
To add an integration:
-
Click 'Add New Rule'
-
Select the 'Event' (In this case, when a new contact is created)
-
Select the integration you want to use (For example your autoresponder)
-
Based on this selection, you will be given options on what to do next. For example, if you are using an autoresponder, you will be asked what list or tags you want to add the lead to.
View a quick walkthrough clip below:
Click here to learn more about settings up your Business Center Integrations
Editing the Form Action
The form action tells the system where to send the LEAD after they optin. You can select between different options based on the type of page you are building:
-
Business Center Page: You will be able to select from the pages you've created in the business center under Marketing -> Pages
-
Go to URL: Send the user to a URL/page of your choice
-
Go to Checkout Cart: Choose from any active checkout carts you've created in your business center
-
Go to Digital Download: Send them directly to download a 'digital download' that you've created under Products -> Digital Downloads
IF YOU ARE WORKING IN A FUNNEL, you will be able send the user to the 'next step' in your funnel, or a specific step in your funnel

