Creating an Offer to Sell Products
Regular products are used to sell your courses. Regular products are extremely flexible, as you can create course bundles, special discount offers, products to be used as upsells and more. Once you create your regular product offer, you will then assign which course (or courses) this product offer unlocks.
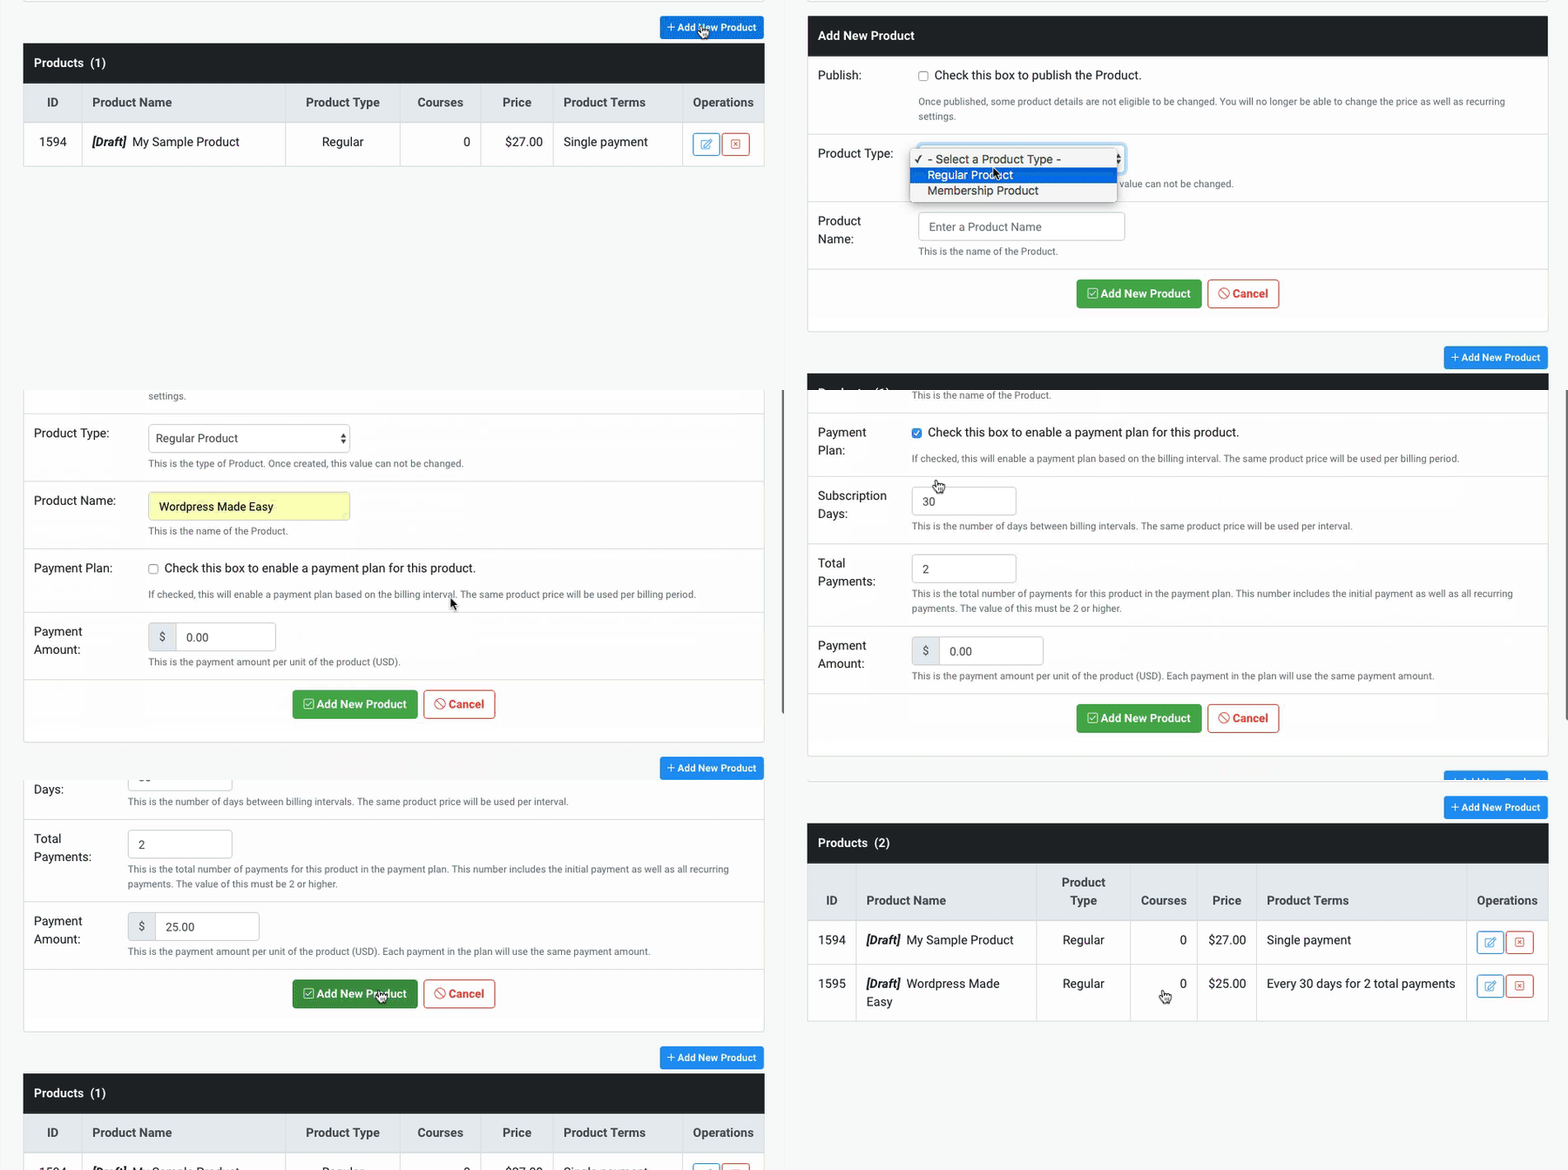
Navigate to Asset Manager -> Product Offer Manager and click on 'Add New Product'
Product Type: This is where you will select the 'product type.' In this case, select Regular Product. Once you select 'Regular Product' from the dropdown, a couple more options will appear - we discuss those below as well

Product Name: Enter the Product name
Payment Plan: If you would like to use a payment plan for this particular product offer, you can tick this checkbox. A payment plan allows you to split the cost of your offer into multiple payments.
Payment Amount: This is the cost of the product offer. If you are choosing to use a payment plan, this field will be the amount of each individual payment, and each payment in the payment plan will be the same.
Publish: Once you have your settings the way you want, you can then publish your product. In order to add courses to your product offer, it must be published. Note that once your product is published, you will not be able to change the price or payment plan settings.
EXAMPLE: I have a course called Wordpress Made Easy, and I want to sell it for $50, but I want to split that up into 2 payments. Here are the steps to take:
-
Select 'Regular Product' from the product type drop down
-
Name the product (ex. Wordpress Made Easy 2 Pay)
-
Select the 'payment plan' checkbox
-
I will have 2 payments 30 days apart so I can leave 'subscription days' and 'total payments' at their default values
-
Because the total of the course is $50, for the 'Payment Amount' I will put $25. That means the user will pay $25 two times, equalling the total value of the course.
Select 'Regular Product' from the product type drop down
Name the product (ex. Wordpress Made Easy 2 Pay)
Select the 'payment plan' checkbox
I will have 2 payments 30 days apart so I can leave 'subscription days' and 'total payments' at their default values
Because the total of the course is $50, for the 'Payment Amount' I will put $25. That means the user will pay $25 two times, equalling the total value of the course.
NOTE: Due to transaction fees, you may want to make sure you add the cost of the multiple transaction fees from your merchant account to the cost of the payments

Adding Courses to Your Products
Once you have published your product offer, it's time to add the course (or courses) that you want this product to unlock.
-
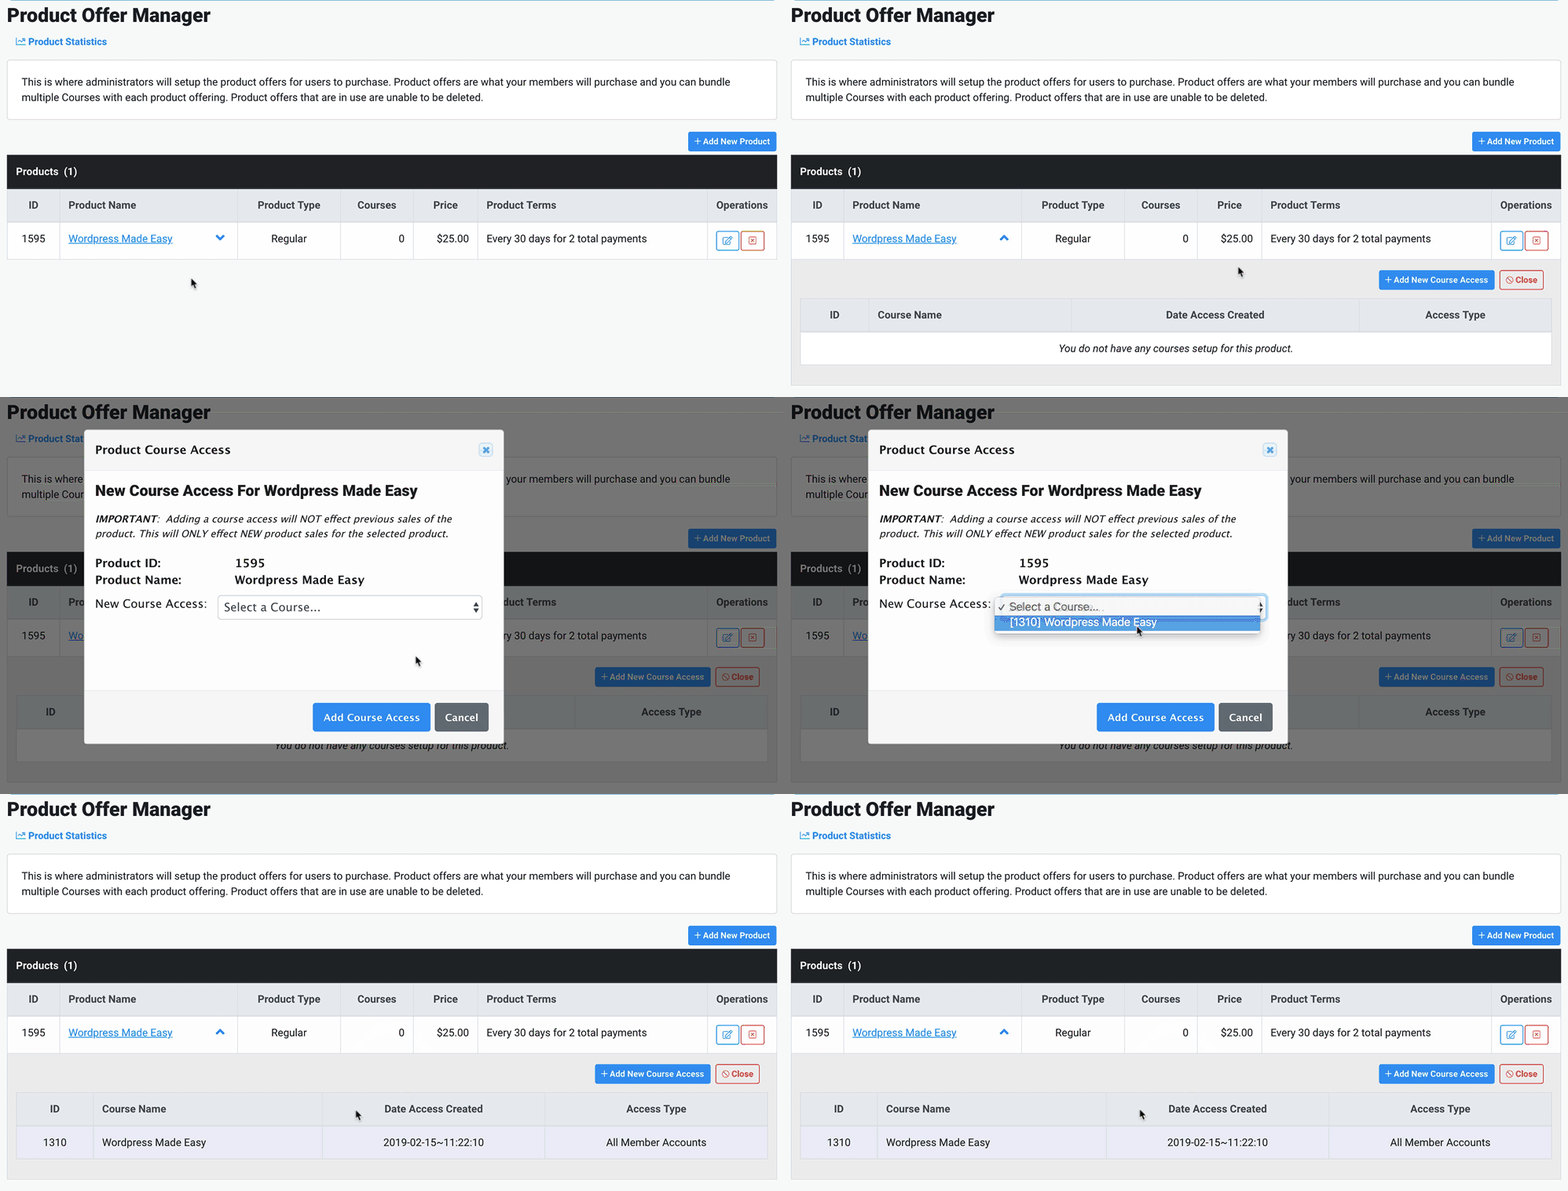
Simply click on the name of the product which will drop down the course access settings.
-
Click on the 'Add New Course Access' button and you will be given a popup that will allow you to select from your existing courses.
-
Select the course you want to unlock with this product and click 'Add Course Access.'
Simply click on the name of the product which will drop down the course access settings.
Click on the 'Add New Course Access' button and you will be given a popup that will allow you to select from your existing courses.
Select the course you want to unlock with this product and click 'Add Course Access.'
Now, when someone purchases this product, this course will be unlocked for the user.

NOTE: You can repeat this process of adding course access to create 'product bundles' and unlock multiple courses with one product offer.
Did this answer your question?😞😐😃