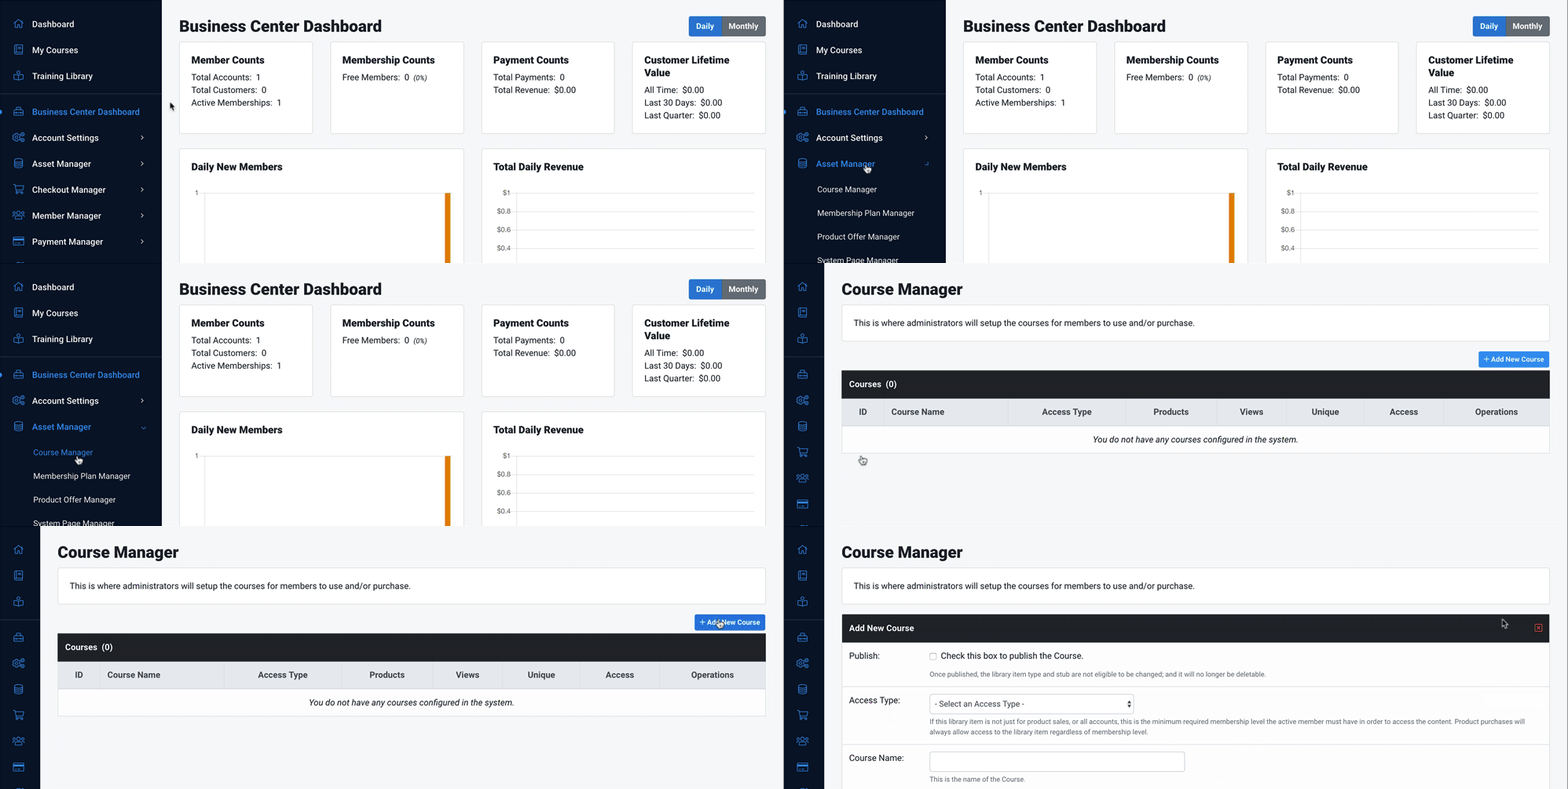
To get started creating your first course, navigate to Asset Manager -> Course Manager and click on the Add Course button on the right.

After clicking the Add Course button you will be asked to enter the name of your course and the stub which is used in the url. (The stub is automatically generated based on the name but you can change it if you'd like).
Once you've named your course, click the green 'Add New Course' button and you will be taken to the 'Course Editor' screen where you can edit the course settings, as well as access the course builder for adding the content. Let's handle the rest of the course settings. You can see what each setting means below.
You can publish your course at any time. Until it's published, it will not appear in your training library or be able to be used in your product offers. Please note that once published, the library item type and stub will not be able to be changed, and it the course will no longer be deletable.
Access Type
Access type is where you will decide how this course will be unlocked for users. Courses can be unlocked via Product Offers, or via Membership Plans. In this dropdown, you will see a few options:
Product Sales Only: If you choose 'product sales only,' this course will not be included in any membership plans, and will only be unlocked if someone purchases a product offer with this course in it.
All Member Accounts: If this option is chosen, the course will be unlocked with ANY membership plans you create (including a free membership plan should you choose).
NOTE: If you choose to unlock this via a membership account, you can still create individual products and bundles to sell this course.
Membership Plans You Created: At the bottom of this dropdown, if you created a membership plan for your Business Center, you will see that as a selection option. If you choose a membership plan that you created, the course will unlock for users who sign up for that membership plan.

Course Name
This is the name of your course that you previously chose. There is a 128 character limit on the title
Course Stub
The stub will be created for you automatically based on the name of your course. The stub is the end of the URL when people are viewing the course content. At this point you will not be able to change the course stub.
Example: member.mydomain.com/this-is-the-stub
Course Description
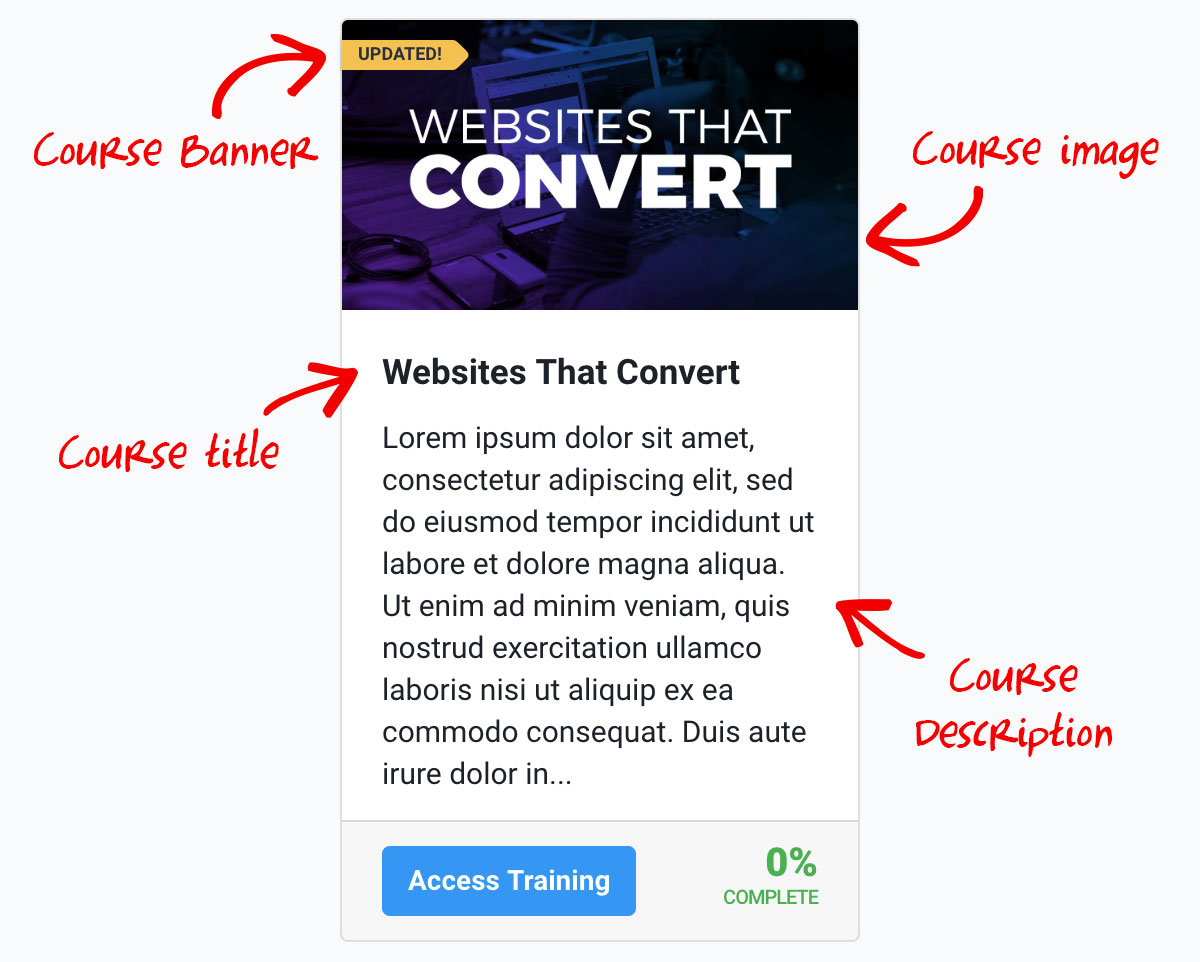
This is the description displayed to the user in their training library. It is optional (but recommended). There is a 258 character limit on the description
Course Banner Settings
This is optional and adds a short banner at the top of the course item in the users training library. It's a good way to notify users if a course is NEW or has recently been UPDATED. (You can see an example below)
Image Upload
This would be an image of the course. This shows up at the top of the course item in the users training library, as well as at the top of the course when people are viewing the content. Recommended image dimensions are 700x394, 1280x720, or 1920x1080. You can quickly create an image for your course using Canva.
NOTE: To add an image, you must create the course first. Then course images can be uploaded and attached to the course.
Below is an example of what all of this looks like in the training library
