Once your have created your upsell page(s), it's time to put them to use by creating Upsell Sequences inside of your checkout funnels.
This is where you will create the custom checkout journey for your customers. Decide which upsell to show them, and then, based on the action they take, you can decide to show them a downsell, another upsell, or complete the funnel.
Create an Upsell Sequence
To create an upsell sequence within a checkout funnel, navigate to Checkout Manager -> Checkout Funnels and click on the 'Edit' icon next to the funnel you want to work on.

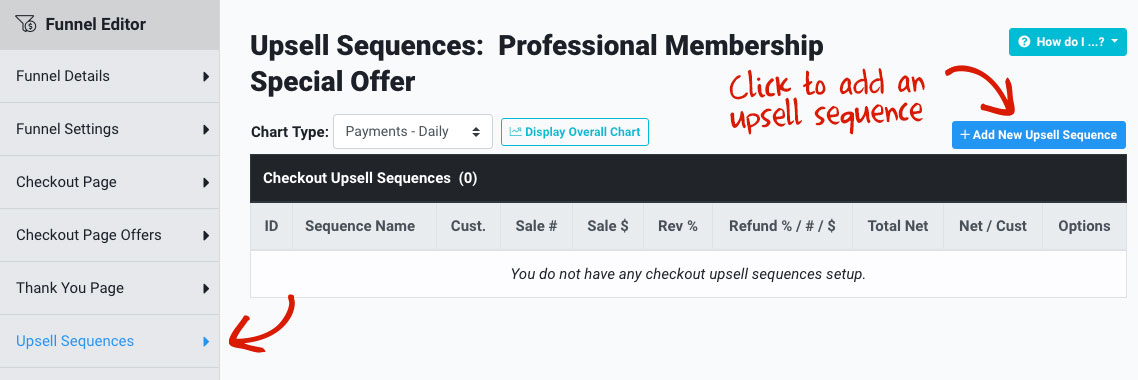
Once inside the checkout funnel editor, click on 'Upsell Sequence' in the Funnel Editor navigation, and click on the 'Add Upsell Sequence' button to create your first upsell sequence.

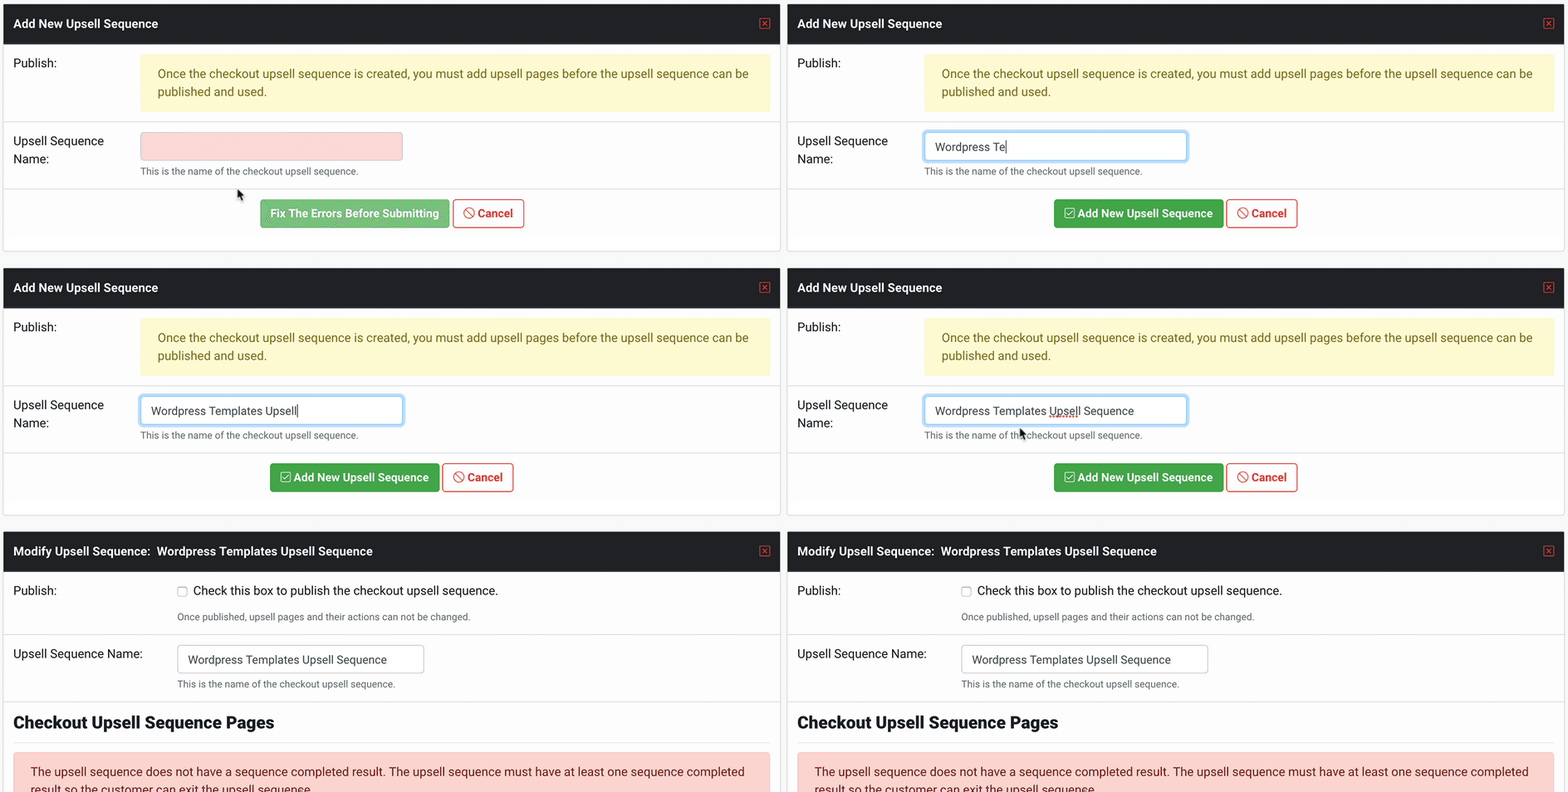
Next step is to name the upsell sequence. The name is for your reference. No one else will see the name. Enter a name and click 'Add New Upsell Sequence,' and you'll be sent to the sequence editor.

Now we get the add upsell pages to the sequence. This is where we get to create the customer checkout journey.
Adding Upsell Pages
Now we get to add our upsell pages to create the upsell sequence. We're going to do this in just a couple of steps. Add all of the pages to the upsell sequence, and then decide what happens when a customer accepts or declines those offers.
NOTE: You'll see a notice that says "The upsell sequence must have at least one sequence completed result so the customer can exit the upsell sequence." All this means is that you need to have an upsell action that leads to the 'thank you' page so the customer can get to the end of the checkout funnel.
Select one of the upsell pages you have created from the dropdown menu and click on 'Add New Upsell Page.'

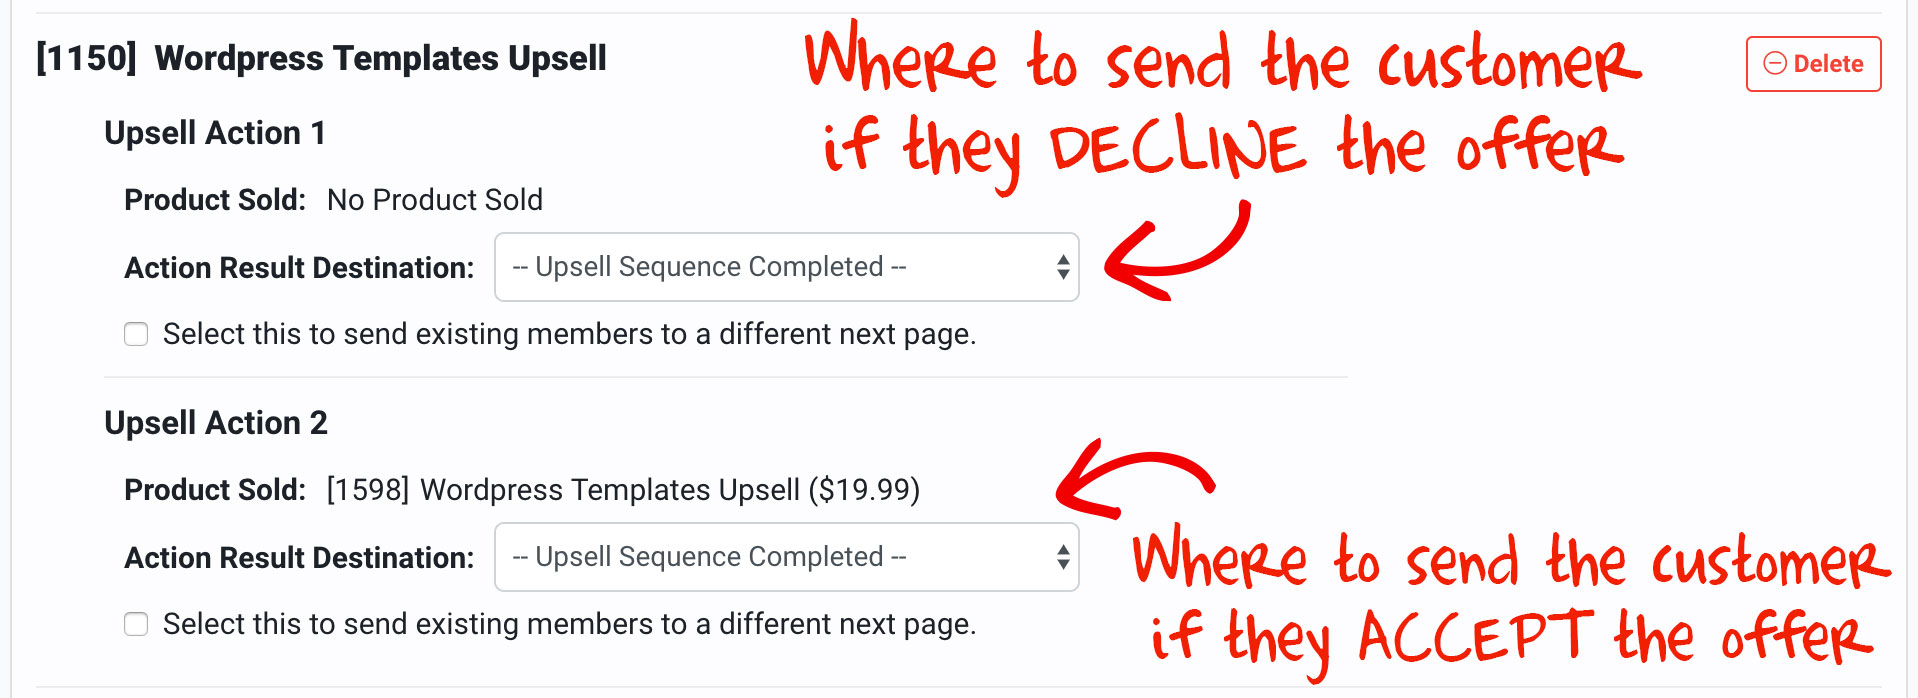
By default, the actions of the upsell page are set to 'Upsell Sequence Completed' - that means if the customer either accepts or declines the offer, they will be sent to the 'Thank You' page to complete the funnel.

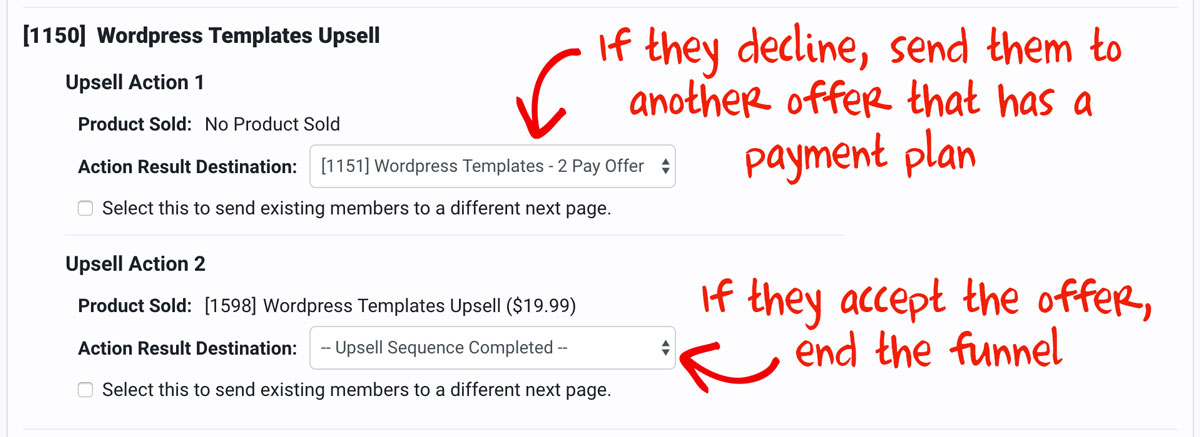
If you add more pages to the upsell sequence, you will have the ability to send the user to a second upsell (or downsell if they decline an offer). This is extremely powerful. For example, if the user declines the initial upsell, I can send them to a 'downsell,' which could be a different offer, or perhaps a payment plan for the same offer. If they accept the first upsell, I could just send them to the thank you page by selecting 'Upsell Sequence Completed' - Like the example below

Advanced Setting for Existing Members
One last setting you may notice when setting up your upsell actions is the 'Select this to send existing members to a different next page.'
This will come in handy if you have membership plans, and you have upsell pages that offer your membership plans at a discounted rate or something similar. You don't want to send current members to an upsell that offers what they already have. So you can check that box, and if the customer is currently a member of one of your membership plans, you can send them to a different offer, or end the funnel.
Complete the Upsell Sequence Setup
Once you are done adding your pages, setting up the actions and completing the customer journey, check the 'Publish' box. NOTE: Once published, upsell pages and their actions can not be changed.

Then, simply click the green 'Modify Upsell Funnel' button. By default all upsell sequences, when published, are 'paused' so you have complete control over when you want them to go live. When you are ready, just click the 'play' icon next to the uspell sequence and it will be added to the checkout funnel.
